How To Write Cursive Writing A To Z
Juapaving
Mar 20, 2025 · 5 min read
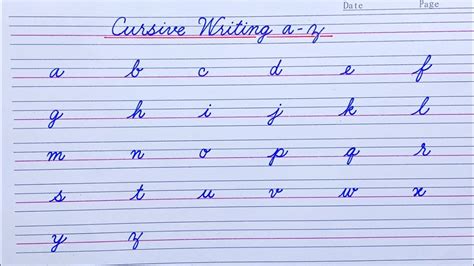
Table of Contents
How to Write Cursive: A Comprehensive Guide from A to Z
Learning cursive handwriting might seem like a relic of the past in our digital age, but mastering this elegant script offers numerous benefits. It improves fine motor skills, enhances memory retention, and fosters a unique personal style. This comprehensive guide provides a step-by-step approach to learning cursive writing, covering each letter of the alphabet from A to Z, along with helpful tips and practice exercises.
Understanding the Fundamentals of Cursive Handwriting
Before diving into individual letters, let's establish a solid foundation in cursive writing techniques. This will ensure consistency and elegance in your handwriting.
1. Posture and Grip
Proper posture is paramount. Sit upright with your feet flat on the floor, maintaining a relaxed yet focused position. Your back should be straight, avoiding slouching. This prevents strain and promotes comfortable writing.
Grip the pen or pencil lightly. A death grip will lead to fatigue and cramped handwriting. Hold the writing instrument between your thumb and index finger, with your middle finger providing support. Your grip should be relaxed, allowing for smooth, fluid movements.
2. The Starting Point: Connecting Strokes
Cursive writing is all about connecting letters. Each letter flows seamlessly into the next, creating a continuous line. Many letters begin with a connecting stroke, which can be either an upward or downward movement. Practice these foundational strokes before moving onto individual letters.
- Upward connecting strokes: These resemble a gentle upward curve.
- Downward connecting strokes: These are typically straight lines moving downwards.
3. Mastering the Basic Strokes
Cursive letters are built from a combination of basic strokes:
- Oval strokes: These form the basis of many letters like 'a', 'd', 'g', and 'o'. Practice making smooth, consistent ovals, both clockwise and counterclockwise.
- Vertical strokes: These are straight lines that move vertically upwards or downwards.
- Horizontal strokes: These are straight lines moving horizontally across the page.
- Slant strokes: These are diagonal lines, often used to connect letters and create the characteristic slant of cursive.
Learning the Cursive Alphabet: A to Z
Now, let's delve into each letter of the alphabet, providing step-by-step instructions and helpful tips. Remember to practice each letter repeatedly until you achieve a smooth, consistent flow.
A: Start with a slightly curved downward stroke, loop upwards, and finish with a downward stroke connecting to the next letter.
B: Begin with a vertical upward stroke, curve to the right forming a loop, and then create a downward stroke that curves back towards the start of the letter.
C: Begin with a gentle upward curve, following a circular motion to complete the letter.
D: Similar to ‘B’, start with a vertical upward stroke, curve to the right, and loop downwards, ending in a slight curve.
E: A simple letter. Start with a downward stroke, loop upwards and curve downwards to complete the letter.
F: Begin with a vertical stroke, loop and extend horizontally.
G: Start with an upward curve, make a loop, and descend down to complete the letter.
H: Make two vertical strokes connected by a horizontal stroke.
I: A vertical stroke, followed by a dot on the top.
J: Start with a curved upward stroke, loop downwards, with a hook at the end.
K: Start with a downward stroke, followed by a diagonal upward stroke, and finish with a downward hook.
L: A simple vertical stroke.
M: Three downward strokes with connected upward strokes in between each stroke.
N: Two downward strokes with a connected upward stroke in between the strokes.
O: A simple oval shape.
P: Start with a downward stroke, followed by a loop towards the right.
Q: Begin with an oval shape, extend a tail to the bottom right.
R: Start with a downward stroke, loop upwards, and extend slightly to the right.
S: A curved stroke starting from the bottom and continuing upwards before returning downwards and finishing with a slight curve.
T: Begin with a downward stroke, extend horizontally, and then a slightly downward curve.
U: A curved upward stroke, ending with a slight upward curve.
V: Two downward strokes creating a pointed shape.
W: Three downward strokes with upward connected strokes in between each stroke.
X: A diagonal upward stroke, followed by a diagonal downward stroke.
Y: A downward stroke, followed by a diagonal upward stroke, and finish with a downward hook.
Z: A diagonal upward stroke, followed by a diagonal downward stroke.
Practice Makes Perfect: Tips and Exercises
Consistent practice is key to mastering cursive handwriting. Here are some tips and exercises to enhance your skills:
- Start slowly: Don't rush the process. Focus on accuracy and smooth strokes.
- Use lined paper: Lined paper helps maintain consistency in letter height and spacing.
- Practice regularly: Even short, daily practice sessions are more effective than infrequent, lengthy ones.
- Use different writing instruments: Experiment with various pens and pencils to find your preference.
- Copy cursive writing samples: Find examples of well-written cursive and practice copying them.
- Write sentences and paragraphs: Once you're comfortable with individual letters, start writing sentences and then paragraphs to improve your fluency.
- Focus on connecting letters: Pay close attention to the smooth transitions between letters.
- Use cursive worksheets: Many free cursive worksheets are available online.
- Don't be afraid to make mistakes: Mistakes are part of the learning process. Learn from them and keep practicing.
- Be patient: Mastering cursive takes time and dedication. Don't get discouraged if you don't see immediate results.
Beyond the Basics: Enhancing Your Cursive Handwriting
Once you've mastered the alphabet, you can explore various techniques to enhance your cursive handwriting:
- Developing your style: Experiment with different letter slants and flourishes to develop a personal style.
- Practicing different fonts: Explore various cursive fonts to broaden your skills.
- Incorporating ligatures: Ligatures are connected letter combinations that give a more sophisticated look.
- Learning calligraphy: Calligraphy builds on the principles of cursive but emphasizes aesthetics and artistic expression.
Conclusion: Embrace the Art of Cursive
Learning cursive handwriting is a rewarding journey. It's a skill that transcends the digital age, offering benefits that extend beyond mere writing. By following the steps outlined in this guide and practicing consistently, you can master this elegant script and reap its many rewards. Remember, practice is key! Embrace the art of cursive and unlock a new level of personal expression. The journey from A to Z is just the beginning of your cursive writing adventure. Enjoy the process, be patient with yourself, and celebrate your progress along the way.
Latest Posts
Latest Posts
-
What Is 6 10 As A Percent
Mar 21, 2025
-
Convert Mixed Number To Decimal Calculator
Mar 21, 2025
-
Sugar Dissolves In Water Physical Or Chemical Change
Mar 21, 2025
-
What Is A Positive Ion Called
Mar 21, 2025
-
Which Of The Following Is An Amino Group
Mar 21, 2025
Related Post
Thank you for visiting our website which covers about How To Write Cursive Writing A To Z . We hope the information provided has been useful to you. Feel free to contact us if you have any questions or need further assistance. See you next time and don't miss to bookmark.
